MyCat 一个彻底开源的,面向企业应用开发的大数据库集群。基于阿里开源的 Cobar 产品而研发。能满足数据库数据大量存储;提高了查询性能。文章介绍如何实现 MyCat 连接 MySQL 实现主从分离,并集成 SpringBoot 实现读写分离。

MySQL 配置主从关系

说明

  • 192.168.0.105 Linux 数据库作为主 master 数据库
  • 127.0.0.1 Window 作为从 slave 数据库

master 主数据库配置

binlog 是 Mysql sever 层维护的一种二进制日志,主要是用来记录对 Mysql 数据更新或潜在发生更新的 SQL 语句,记录了所有的写语句,并以事务的形式保存在磁盘中,还包含语句所执行的消耗的时间,MySQL 的二进制日志是事务安全型的。

  • master 上开启 log_bin

    1
    2
    3
    4
    5
    6
    7
    8
    9
    10
    11
    $ vim /etc/my.cnf


    log-bin = mysql-bin #[必须]启用二进制日志
    server-id = 4 #[必须] 服务器唯一 ID,默认是 1,最好取 ip 的后 3 位
    expire-logs-days = 7 #只保留 7 天的二进制日志,以防磁盘被日志占满
    binlog-ignore-db = mysql #不备份的数据库
    binlog-ignore-db = information_schema
    binlog-ignore-db = performation_schema
    binlog-ignore-db = sys
    binlog-do-db=itools_simple #需要做复制的数据库名,如果有多个,复制 binlog-do-db 即可
  • 登录 mysql,测试 log_bin 是否成功开启

    1
    2
    3
    4
    5
    6
    7
    8
    9
    10
    11
    12
    13
    14
    15
    16
    $ mysql -u root -p
    Root@123

    // log_bin ON 表示开启成功,OFF 表示开启失败
    mysql> show variables like '%log_bin%';
    +---------------------------------+--------------------------------+
    | Variable_name | Value |
    +---------------------------------+--------------------------------+
    | log_bin | ON |
    | log_bin_basename | /var/lib/mysql/mysql-bin |
    | log_bin_index | /var/lib/mysql/mysql-bin.index |
    | log_bin_trust_function_creators | OFF |
    | log_bin_use_v1_row_events | OFF |
    | sql_log_bin | ON |
    +---------------------------------+--------------------------------+
    6 rows in set (0.01 sec)
  • 新增备份账户

    1
    2
    3
    mysql> grant replication slave on *.* to 'backup'@'%' identified by 'Root@123';
    mysql> use mysql
    mysql> select user,authentication_string,host from user;
  • 重启 mysql

    1
    $ systemctl restart mysqld
  • 登录 mysql,并设置只读

    1
    2
    3
    4
    5
    6
    7
    8
    9
    10
    11
    12
    13
    14
    15
    16
    17
    18
    19
    20
    21
    $ mysql -u root -p
    Root@123

    mysql> flush tables with read lock;

    mysql> show master status \G
    *************************** 1. row ***************************
    File: mysql-bin.000003
    Position: 154
    Binlog_Do_DB: itools_simple
    Binlog_Ignore_DB: mysql,information_schema,performation_schema,sys
    Executed_Gtid_Set:
    1 row in set (0.01 sec)

    // 导出数据库,进入到一个合适的文件夹
    $ mysqldump -u root -p itools_simple > itools_simple.txt
    // 把生成的文件导出到本机
    $ sz itools_simple.txt

    // 在 window 本机打开 cmd,登录 slave 本机 mysql 数据库,导入数据库
    $ .\mysql -u root -p -hlocalhost mycat_master < .\itools_simple.txt

slave 从数据库配置

  • 配置 my.ini 文件

    1
    2
    3
    4
    5
    6
    7
    8
    9
    10
    11
    [mysql]
    #default-character-set=utf8

    [mysqld]
    max_connections=200
    character-set-server=utf8
    default-storage-engine=INNODB

    # 添加一下配置
    log-bin=mysql-bin
    server-id=223
  • 重启 slave 数据库

    1
    2
    net stop mysql
    net start mysql
  • 登录 slave 数据库

    1
    2
    3
    4
    5
    6
    7
    8
    9
    10
    11
    12
    13
    14
    15
    16
    17
    18
    19
    20
    21
    22
    23
    24
    25
    26
    27
    28
    29
    30
    $ mysql -u root -p
    123456

    // 停止 slave
    mysql> stop slave;
    // 根据 master 中的 status,添加以下配置
    msyql> change master to master_host='192.168.0.105',master_user='backup',master_password='Root@123',master_log_file='mysql-bin.000003',master_log_pos=154;
    // 启用 slave
    mysql> start slave;
    // 查看 slave 状态
    mysql> show slave status \G
    *************************** 1. row ***************************
    Slave_IO_State: Waiting for master to send event
    Master_Host: 192.168.0.105
    Master_User: backup
    Master_Port: 3306
    Connect_Retry: 60
    Master_Log_File: mysql-bin.000003
    Read_Master_Log_Pos: 154
    Relay_Log_File: DESKTOP-OB9O5N7-relay-bin.000002
    Relay_Log_Pos: 320
    Relay_Master_Log_File: mysql-bin.000003
    Slave_IO_Running: Yes
    Slave_SQL_Running: Yes
    ..............
    1 row in set (0.00 sec)

    // 出现下面两个说明配置正确
    Slave_IO_Running: Yes
    Slave_SQL_Running: Yes
  • 关闭 master 数据库的只读设置

    1
    mysql> unlock tables;

存储引擎

InnoDB 特性

MySQL5.5 版本后,MySQL 的默认内置存储引擎已经从 MyISAM 变成 InnoDB

  • 支持事务;
  • 行级锁定(更新数据时一般指锁定当前行):通过索引实现、全表扫描忍让时表锁、注意间隙所的影响;
  • 读写阻塞与事务的隔离级别相关;
  • 具有非常高的缓存特性(既能缓存索引、也能缓存数据);
  • 这个表和主键以组 (Cluster) 的方式存储、组成一颗平衡树;
  • 所有的辅助索引 (secondary indexes) 都会保存主键信息;
  • 支持分区、表空间类似与 oracle 数据库;
  • 支持外键约束、不支持全文检索(5.5.5 之前的 MyISAM 支持全文检索、5.5.5 之后就不在支持);
  • 相对 MyISAM 而言、对硬件的要求比较高

MyISAM 特性

  • 不支持事务
  • 表级锁定,数据更新时锁定整个表:其锁定机制是表级锁定,这虽然可以让锁定的实现成本很小但是也同时大大降低了其并发性能。
  • 读写互相阻塞:不仅会在写入的时候阻塞读取,myisam 还会在读取的时候阻塞写入,但读本身并不会阻塞另外的读。
  • 只会缓存索引:MyISAM 可以通过 key_buffer_size 缓存索引,以大大提高访问性能,减少产品 IO,但是这个缓存区只会缓存索引,而不会缓存数据。
  • 读取速度较快,占用资源相对少。
  • 不支持外键约束,但支持全文索引。

修改 slave 数据库存储引擎

1
2
3
4
5
6
7
8
9
10
11
12
13
14
15
16
17
18
19
20
21
22
23
24
25
26
27
28
mysql> show variables like '%storage_engine%';
+----------------------------------+--------+
| Variable_name | Value |
+----------------------------------+--------+
| default_storage_engine | InnoDB |
| default_tmp_storage_engine | InnoDB |
| disabled_storage_engines | |
| internal_tmp_disk_storage_engine | InnoDB |
+----------------------------------+--------+
4 rows in set (0.00 sec)

// 修改配置文件
$ vim /etc/my.ini
[mysqld]
default-storage-engine=MyISAM

$ systemctl restart mysqld

mysql> show variables like '%storage_engine%';
+----------------------------------+--------+
| Variable_name | Value |
+----------------------------------+--------+
| default_storage_engine | MyISAM |
| default_tmp_storage_engine | InnoDB |
| disabled_storage_engines | |
| internal_tmp_disk_storage_engine | InnoDB |
+----------------------------------+--------+
4 rows in set (0.00 sec)

修改表存储引擎

如果是 slave 数据库的表是 MyISAM,master 数据库的表是 InnoDB。直接覆盖 master 数据库来同步数据的话,slave 数据库表的存储引擎也将会同步变成 InnoDB。

更换存储引擎遇到的问题

This function has none of DETERMINISTIC, NO SQL, or READS SQL DATA in its declaration and binary logging is enabled (you might want to use the less safe log_bin_trust_function_creators variable)

  • 出现的原因

    1
    2
    在 function 里面,只有 DETERMINISTIC, NO SQL 和 READS SQL DATA 被支持。
    如果我们开启了 bin-log, 我们就必须为我们的 function 指定一个参数。
  • 解决方案

    1
    mysql> set global log_bin_trust_function_creators=TRUE;

Specified key was too long; max key length is 1000 bytes

  • 出现的原因

    1
    2
    3
    1.DB 的 engine 是 MyISAM
    2. 字符集是 utf8 ,1 个 utf8=3bytes
    3.(索引长度总和) * 3 > 1000。
  • 解决方案

    1
    2
    3
    1. 修改 DB engine 至 innodb
    2. 更改字符集
    3. 减小字段长度

注意:一定不要手动去修改 slave 数据库中的数据,需要给 slave 的用户设置只读。

至此,mysql 的数据库主从设置已经配置成功。在 master 中修改数据库,会同步到 slave 中。

Mycat 基于 MySQL 的读写分离

Mycat 不负责数据的同步,所以要还是要基于 MySQL 的主从配置来实现读写分离。

安装 Mycat

github 下载地址,新版本从以下地址下载 http://dl.mycat.io

  • Linux 创建文件夹/usr/local/mycat,进入文件夹,下载安装包

    1
    2
    3
    4
    5
    6
    7
    8
    9
    10
    11
    12
    13
    $ wget http://dl.mycat.io/1.6.7.5/2020-3-3/Mycat-server-1.6.7.5-test-20200303154735-linux.tar.gz
    $ tar -zxvf Mycat-server-1.6.7.5-test-20200303154735-linux.tar.gz
    $ cd mycat
    $ useradd mycat
    $ chown -R mycat:mycat /usr/local/mycat/mycat
    $ passwd mycat

    // 配置 hostname,添加以下配置
    [root@localhost mycat] vim /etc/sysconfig/network
    HOSTNAME=localhost(主机名)

    // 查看是否配置主机
    $ vim /etc/hosts
  • 将 Mycat 配置到环境变量中

    1
    2
    3
    4
    5
    6
    7
    8
    $ vim /etc/profile
    // 在最后添加
    MYCAT_HOME=/usr/local/mycat/mycat
    PATH=$MYCAT_HOME/bin:$PATH
    export PATH

    // 使配置生效
    $ source /etc/profile
  • 在 master 数据库中添加 user1(写)、user2(只读)两个账户,并配置权限。

  • 配置 mycat 的schema.xml

    1
    2
    3
    4
    5
    6
    7
    8
    9
    10
    11
    12
    13
    14
    15
    16
    <?xml version="1.0"?>
    <!DOCTYPE mycat:schema SYSTEM "schema.dtd">
    <mycat:schema xmlns:mycat="http://io.mycat/">

    <schema name="itools_simple" checkSQLschema="false" sqlMaxLimit="100" dataNode="dn1">
    </schema>
    <dataNode name="dn1" dataHost="localhost" database="itools_simple" />
    <dataHost name="localhost" maxCon="1000" minCon="10" balance="0"
    writeType="0" dbType="mysql" dbDriver="native" switchType="1" slaveThreshold="100">
    <heartbeat>select user()</heartbeat>
    <writeHost host="hostM1" url="192.168.0.105:3306" user="user1" password="Root@123">
    <!-- 可以配置多个从库 -->
    <readHost host="hostS2" url="127.0.0.1:3306" user="user2" password="Root@123" />
    </writeHost>
    </dataHost>
    </mycat:schema>
  • 配置 mycat 的server.xml,增加两个用户

    1
    2
    3
    4
    5
    6
    7
    8
    9
    10
    11
    12
    <user name="user1" defaultAccount="true">
    <property name="password">Root@123</property>
    <property name="schemas">itools_simple</property>
    <property name="defaultSchema">itools_simple</property>
    </user>

    <user name="user2">
    <property name="password">Root@123</property>
    <property name="schemas">itools_simple</property>
    <property name="readOnly">true</property>
    <property name="defaultSchema">itools_simple</property>
    </user>

启动 Mycat

  • 启动 mycat

    1
    2
    $ mycat start
    Starting Mycat-server...
  • 查看启动日志

    1
    2
    $ cat wrapper.log
    MyCAT Server startup successfully. see logs in logs/mycat.log

使用客户端连接 mycat

  • 使用 SQLyog 连接(使用此方式连接,不能直接通过点击表查看数据)
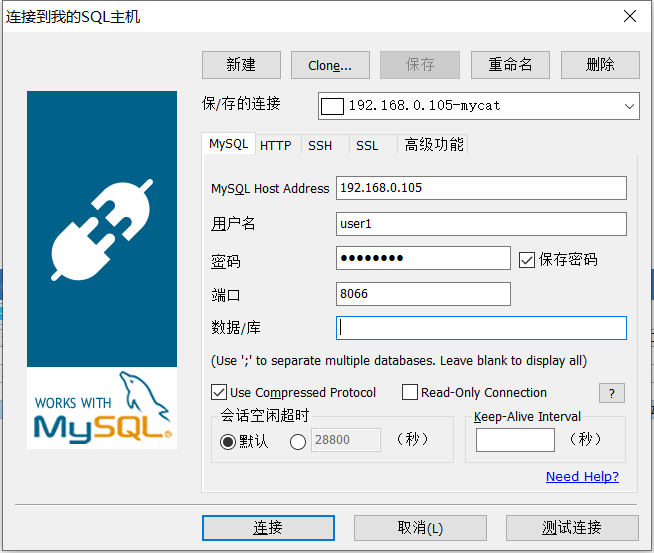
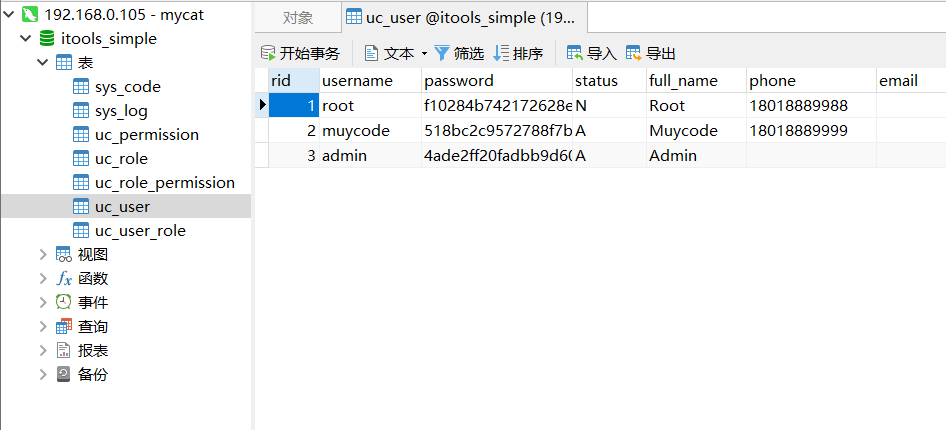
sqlyog-connection-mycat

  • 使用 Navicat 连接

navicat-connection-mycat

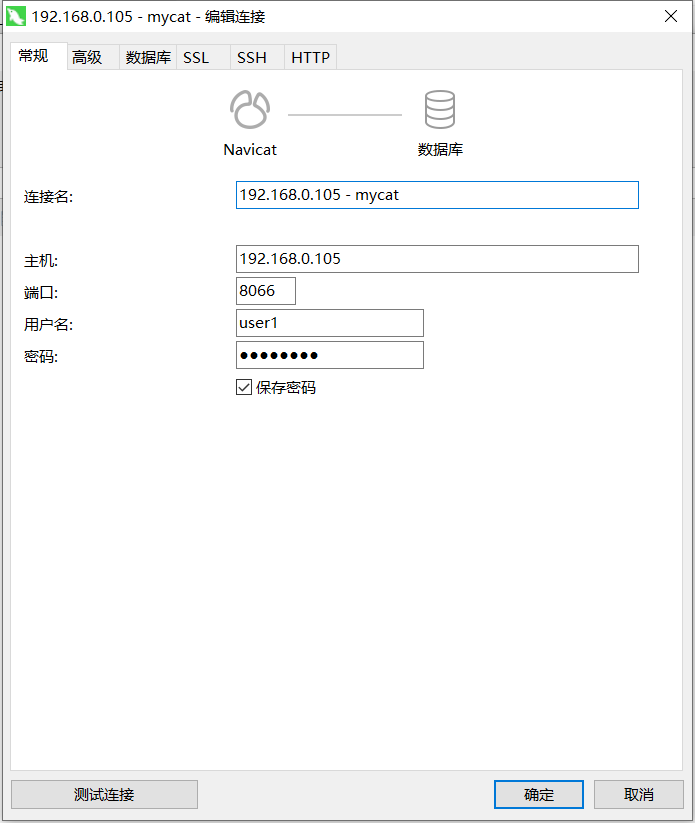
  • 可通过客户端直接查看 master 数据,也可通过修改 mycat 数据,查看 master 和 slave 的数据是否会同步

navicat-show-mycat

SpringBoot 整合 MyCat 实现读写分离

其实整合 MyCat 之后,切换数据源的工作可以交给 MyCat,不需要以下操作,手动切换。以下只是介绍怎么手动切换数据源

  • 首先需要配置好数据库的主从关系。
  • 配置好 MyCat 服务。
  • 实现 MyCat 与 MySQL 读写分离。

添加依赖

1
2
3
4
5
6
7
8
9
10
<dependency>
<groupId>org.springframework.boot</groupId>
<artifactId>spring-boot-starter-aop</artifactId>
</dependency>

<dependency>
<groupId>com.alibaba</groupId>
<artifactId>druid</artifactId>
<version>1.0.23</version>
</dependency>

创建数据源

1
2
3
4
5
6
7
8
9
10
11
12
13
14
15
16
17
18
19
20
21
22
23
24
25
26
27
28
29
30
31
32
33
34
package com.muycode.itoolsimple.datasource;

import org.springframework.boot.context.properties.ConfigurationProperties;
import org.springframework.boot.jdbc.DataSourceBuilder;
import org.springframework.context.annotation.Bean;
import org.springframework.context.annotation.Configuration;

import javax.sql.DataSource;

@Configuration
public class DataSourceConfig {

/**
* 创建可读数据源
*
* @return
*/
@Bean(name = "selectDataSource")
@ConfigurationProperties(prefix = "spring.datasource.select")
public DataSource dataSource1() {
return DataSourceBuilder.create().build();
}

/**
* 创建可写数据源
*
* @return
*/
@Bean(name = "updateDataSource")
@ConfigurationProperties(prefix = "spring.datasource.update")
public DataSource dataSource2() {
return DataSourceBuilder.create().build();
}
}

设置数据源

1
2
3
4
5
6
7
8
9
10
11
12
13
14
15
16
17
18
19
20
21
22
23
24
25
26
27
28
29
30
31
32
33
34
package com.muycode.itoolsimple.datasource;

import org.springframework.context.annotation.Lazy;
import org.springframework.stereotype.Component;

@Component
@Lazy(false)
public class DataSourceContextHolder {

/**
* 采用 ThreadLocal 保存本地多数据源
*/
private static final ThreadLocal<String> contextHolder = new ThreadLocal<>();

/**
* 设置数据源类型
*
* @param dbType
*/
public static void setDbType(String dbType) {
contextHolder.set(dbType);
}

/**
* 获取数据源类型
*/
public static String getDbType() {
return contextHolder.get();
}

public static void clearDbType() {
contextHolder.remove();
}
}

返回数据源

1
2
3
4
5
6
7
8
9
10
11
12
13
14
15
16
17
18
19
20
21
22
23
24
25
26
27
28
29
30
31
32
33
34
35
36
37
38
39
40
41
42
43
44
45
package com.muycode.itoolsimple.datasource;

import org.springframework.beans.factory.annotation.Autowired;
import org.springframework.beans.factory.annotation.Qualifier;
import org.springframework.context.annotation.Primary;
import org.springframework.jdbc.datasource.lookup.AbstractRoutingDataSource;
import org.springframework.stereotype.Component;

import javax.sql.DataSource;
import java.util.HashMap;
import java.util.Map;

@Component
@Primary
public class DynamicDataSource extends AbstractRoutingDataSource {

@Autowired
@Qualifier("selectDataSource")
private DataSource selectDataSource;

@Autowired
@Qualifier("updateDataSource")
private DataSource updateDataSource;

/**
* 返回生效的数据源名称
*/
@Override
protected Object determineCurrentLookupKey() {
return DataSourceContextHolder.getDbType();
}

/**
* 配置数据源信息
*/
@Override
public void afterPropertiesSet() {
Map<Object, Object> map = new HashMap<>(16);
map.put("selectDataSource", selectDataSource);
map.put("updateDataSource", updateDataSource);
setTargetDataSources(map);
setDefaultTargetDataSource(updateDataSource);
super.afterPropertiesSet();
}
}

创建切面,动态设置数据源

1
2
3
4
5
6
7
8
9
10
11
12
13
14
15
16
17
18
19
20
21
22
23
24
25
26
27
28
29
30
31
32
33
34
35
36
37
38
39
40
41
42
43
44
45
46
47
48
49
50
51
52
53
54
55
package com.muycode.itoolsimple.datasource;

import org.aspectj.lang.JoinPoint;
import org.aspectj.lang.annotation.Aspect;
import org.aspectj.lang.annotation.Before;
import org.springframework.context.annotation.Lazy;
import org.springframework.core.annotation.Order;
import org.springframework.stereotype.Component;

@Aspect
@Component
@Lazy(false)
@Order(0) // Order 设定 AOP 执行顺序 使之在数据库事务上先执行
public class DataSourceOptionAop {

/**
* 可读数据源
*/
private final static String DATASOURCE_TYPE_SELECT = "selectDataSource";
/**
* 可写数据源
*/
private final static String DATASOURCE_TYPE_UPDATE = "updateDataSource";

/**
* 创建切面,根据方法类型选择不同的数据源
*
* @param joinPoint
* @author muycode
*/
@Before("execution(* com.zdys.tcmmes.*.service.*.*(..))")
public void process(JoinPoint joinPoint) {
String methodName = joinPoint.getSignature().getName();
System.out.print("=========== " + methodName);
if (methodName.startsWith("save") || methodName.startsWith("update")
|| methodName.startsWith("del") || methodName.startsWith("add") || methodName.startsWith("login")
|| methodName.startsWith("logout") || methodName.startsWith("send")) {
DataSourceContextHolder.setDbType(DATASOURCE_TYPE_UPDATE);
System.out.println("----------------- 使用 updateDataSource 数据源 -------------------");
} else {
DataSourceContextHolder.setDbType(DATASOURCE_TYPE_SELECT);
System.out.println("----------------- 使用 selectDataSource 数据源 -------------------");
}
}

/**
* 在 service 服务层使用完之后,清理绑定的数据源
*
* @author muycode
*/
@After("execution(* com.zdys.tcmmes.*.service.*.*(..))")
public void after() {
DataSourceContextHolder.clearDbType();
}
}

输出结果

1
2
3
4
5
6
7
8
9
10
11
12
=========== getByUsername----------------- 使用 selectDataSource 数据源 -------------------
=========== getPermissionStringByUserId----------------- 使用 selectDataSource 数据源 -------------------
=========== getPermissionByUserId----------------- 使用 selectDataSource 数据源 -------------------
=========== getRolePermissionLinkByUserId----------------- 使用 selectDataSource 数据源 -------------------
=========== save----------------- 使用 updateDataSource 数据源 -------------------
=========== queryByPage----------------- 使用 selectDataSource 数据源 -------------------
=========== save----------------- 使用 updateDataSource 数据源 -------------------
=========== getPermissionAll----------------- 使用 selectDataSource 数据源 -------------------
=========== save----------------- 使用 updateDataSource 数据源 -------------------
=========== getSysCodeAll----------------- 使用 selectDataSource 数据源 -------------------
=========== save----------------- 使用 updateDataSource 数据源 -------------------
=========== getByRid----------------- 使用 selectDataSource 数据源 -------------------

参考文章:

mysql5.7.18 的安装与主从复制
Mycat - 实现数据库的读写分离与高可用
关于利用 mycat 结合 springboot 实现数据库的读写分离(动态切换数据源)